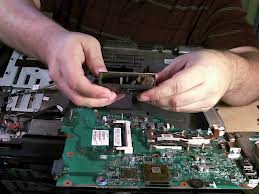
Guide to Cleaning Your Laptop Fan
About 2 week ago, we shared on “Recovery of Deleted and Corrupted Files in Your Hard Drive“, today we will talk about “Guide to Cleaning Your Laptop Fan“.
A dirty cooling fan does not only make your computer work harder when you are using it, but it also poses a threat of having the processor overheat. Just like most household electric fans, laptop cooling fans are very prone to collecting dust and accumulating dirt. Therefore, it would be best to have your cooling fan be cleaned from time to time. However, it might be expensive to bring your laptop to repair shops to have it cleaned regularly. Also considering that repair and cleaning fees varied from model to model, laptop with more sophisticated structure will require higher fees.
If they can clean your laptop fan, why can’t you? By learning some simple steps for cleaning your laptop cooling fan yourself, you can actually save up some money and still have your computer working in top condition. Be careful though and always check your manual. You may not be spending on having your cooling fan cleaned by a technician; but, if you will not be cautious, you might end up paying more for replacement fan, or worst, a new laptop.
So now, have your screwdriver, some screw baggie, dry cleaning cloth and compressed air ready and start cleaning like a pro!
1) First, make sure that you have turned off your laptop and unplugged it from any power source. Do not attempt to clean your cooling fan while your laptop is still on or is still connected to a power grid or battery. Not only will you destroy your laptop, you are also at risk of getting electrical shock and suffer injuries.
2) Next is to locate the RAM cover and remove it. In most laptops, it is located near the battery compartment. Unscrew the RAM cover and lift it carefully. Do not force to remove the RAM cover from the laptop. If it does not come off quite easily, check whether something else is attached to it or look carefully as to what could have stuck it in.
3) Once you have removed the RAM cover from the laptop, you may then carefully unscrew fan. Just remember to separate the screws from the ones from the RAM cover so as not to mix it up, since usually they are of the different size.
4) Gently wipe the blades of the laptop fan and blow out remaining dirt using the compressed air. Screw the fan in place and carefully put back the RAM cover and secure it tightly with the screws.
Plug in your laptop and turn it on to check if the fan is still working and if your laptop is still all right. If your laptop fan is not working, you might want to contact us for assistance.
Fatal error: Uncaught Exception: 12: REST API is deprecated for versions v2.1 and higher (12) thrown in /home2/laptopre/public_html/wp-content/plugins/seo-facebook-comments/facebook/base_facebook.php on line 1273


